DMX RGB LED Strip Installation Step-by-Step Guide
Simple DMX Controlled LED Strip Installation
Throughout, your life you may have seen, or experienced, a wonderful world of vivid and colorful lighting effects. The concerts you’ve been to, the circuses you may have gone to as a child, and even the display on your television set. But how do these live events and technologies produce such an endorphin-raising effect?
The process can be complicated, but it doesn’t have to be. Today we’re going to walk through the steps of a DMX Controlled LED strip installation that you can follow to create lighting effects that will amaze your friends and family. The process works for everyday household and personal lighting effects as well as professional-grade, large scale lighting installations.
What You’ll Need
As we mentioned in the introduction, the installation process for the SIRS-E’s DMX LED is simple. Every setup requires a list of materials, and to successfully have yours up and running you need the following:
- SIRS-E DMX LED RGB Strip ( SKU # 5050-LED-RGBWP-24DMX5M )
- Two 5 volt LED power supplies ( SKU # LED-PS5V-40W )
- One 3 pin female to 5 pin male adapter ( SKU # 70029 )
- MADRIX NEO Lighting Control Software ( SKU # IA-DMX-001003 )
- Personal Computer
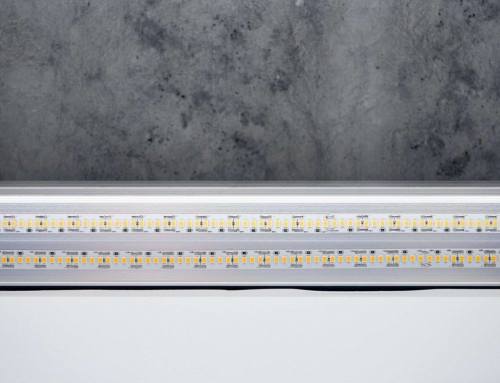
Before we jump into the installation process, let’s highlight a few key features of some of these items. The DMX LED RGB Strip is a dynamically altering effect strip and is DMX programmable with the combinational use of any lighting control software. It has all the components of our high quality LED strips, but with a twist. You can individually change the effects of each pixel with the use of the MADRIX NEO Software.
As for the MADRIX NEO Software, you can create some wild visual effects like those displayed in the installation video. The software comes jam packed with 512 allowable DMX channels and is supported with the latest USB 2.0 standard.
DMX LED Strip Installation Process
If you haven’t already done so, you’ll need to install the MADRIX software on your PC.
- Install the MADRIX NEO software on your personal computer. The software installation is like any other installation you’ve done. Just follow the instructions when the partner program executes and read each page closely.
- Once the software installation is complete, connect the MADRIX NEO interface into the USB slot of your PC. Locate the MADRIX program recently installed on your computer and open it.
So far, so good? Let us continue with the MADRIX software interface.
- Click on the tab labled “Preferences” – you should find it at the top of the program.Then click on “Matrix Generator”; another window will open. Under the “Placement” text-field you will see 3 axis section under the “Count XYZ”.
- Set the X axis to 120, and the Y and Z axis to 1 in the “Placement” section.
- Above the “Placement” section, you will see the word “Fixture”. Set your fixture to “generic RGB light 1 Pixel”. Click apply and OK. Wasn’t too difficult, now, was it? After those settings have been changed, your DMX RGB LED Strip is set to fit with the MADRIX NEO Software.
Making the connection:
- Cut off the connector at the end of the power supply and expose the copper wires. Be careful not to cut the part that you connect to an outlet. Afterwards, grab the wire with the white lettering on the power supply, and make note somewhere; this will be your positive lead. (make sure there is no power running)
- Connect your positive lead to the red strip at the end of your LED strip, and your negative lead with the black wire. Be sure to have one power supply per end of the strip. Your power is now setup.
- Connect the 3-to-5 pin adapter to the NEO DMX interface output to your DMX LED Strip.
- Turn on the power supply.
Ready For Live Events
You have now successfully setup your DMX RGB LED Strip for use. Play around with it and discover the endless possibilities. The color mixing and variations will not only astound your audience, but yourself. It is a simple installation, and we hope to have described it with as much detail as possible to help you.


Leave A Comment
You must be logged in to post a comment.